
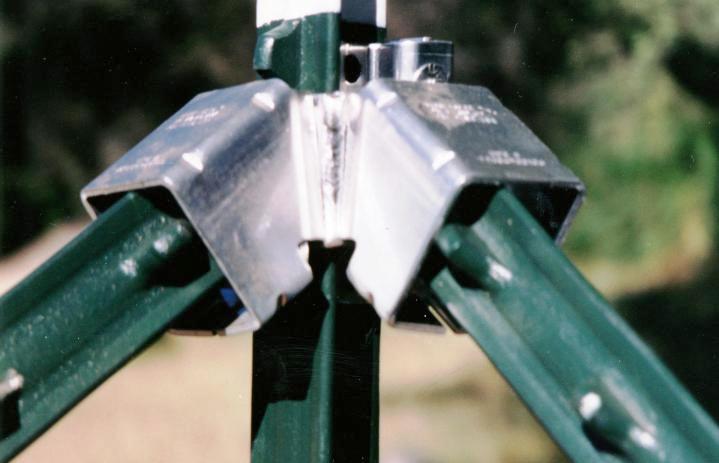
DIY T Post Corner Brace
Introduction
A T Post Corner Brace is an easy way to add strength and stability to your farm fence by preventing posts from leaning outwards in solid winds, ntroand it only takes about 10 minutes to make one. This DIY T Post Corner Brace uses no power tools.
Just some screws and the materials you probably already have on hand. This DIY T Post Corner Brace can save you time and money if you own a farm or run cattle, sheep, horses, goats, or livestock or game animals.
Tools needed
A power drill is a drill bit with an eye large enough to fit a barbed staple into a shovel and eight barbed staples. A barbed staple gun would be helpful as well. The post hole digger can be left in its container. We will use our feet to dig holes for our corners. To create a DIY T Post Corner Brace, you’ll need four corner braces that are 48 long and two corner braces.
If you have access to them already, you may also want some string or rope not pictured, which can be used for tying off your t-posts if they don’t come pre-tied. You’ll also need something heavy-duty like a sled hammer or maul not pictured for pounding your posts into place once they’re set up.
Materials needed
4- 6′ 2X4s, 1×8 lumber, 4- 3′′ screws (1/2′′ or 3/4′′), 100 feet of 9 gauge galvanized wire fence. How many braces you will need is calculated on a base of 10-foot sections with five posts equaling 400 pounds. If your section requires additional posts to reach ten feet, adjust accordingly. The brace should be spaced every fourth post within a mile of a roadway barn or driveway that sees high traffic levels and around every third post otherwise.
These are general guidelines for all fences, and more information can be found on my county Extension Office website, which has very detailed information about borders. The brace is made from 1×8 lumber with a 2×4 cross piece cut from a 2×4. The cut pieces should be 36 inches long.
Attach the brackets to the wood posts
The brackets will fit snugly around your wooden posts. The post attaches a frame using screws on each side of each corner. Suppose you have difficulty nailing through thick wood drill holes and then pulling nails to hang them. Make sure they are evenly spaced, as shown in the photo. Using at least four screws per bracket, six would be better.
A cordless power screwdriver is an excellent way to get at those hard-to-reach areas. If you don’t already own one, consider getting one for these projects because they make it so much easier and safer than using an electric drill. Once all four brackets are attached, you can hang your gate on them by sliding a bolt through each frame.
Conclusion
While you might not think about it, your fence is an essential piece of any landscape design. Sturdy, secure fencing looks good and protects all that time and money you’ve invested in planting beautiful trees, bushes, and flowers. If your current fence is looking a little rough around the edges or if it’s on its last leg, it’s time to consider replacing it with something new.
Check out some fence corner braces explicitly designed for DIY installation before running out to your local big-box store for a premade model. These braces will hold up fences of all shapes and sizes, from U-shaped models like those pictured here to more complex four-way designs.